This
guide describes how to connect serial console to server running Ubuntu 12.04.
Why
is my guide special comparing to many others easily available on the WEB?
Well,
there are plenty docs if you want to use to configure first standard serial
port (COM1/ttyS0),
but
I haven't found any guide how to add non-standard RS-232 port on the
PCI-Express card.
Not
the way, that it would allow you to work with GRUB remotely :-)
I
have a small home server running Ubuntu 12.04.
It
is running at the attic of my house and I didn't want to go there (especially
at winter) each time the server is stuck at the boot stage or due to fsck problems.
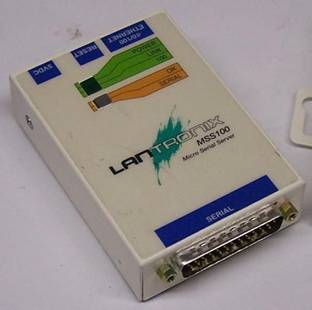
The
solution seemed to be obvious - RS-232 serial console connected to 1-port terminal
server (serial/IP converter).
I
have bought old used Lantronix MSS100 to get remote
access to serial port:
But
the problem was, that there was NO SERIAL PORT on the motherboard of my server.
It
is X58 platform (1366 CPU socket) with Sapphire X58 PureBlack
MB. It is awesome motherboard. Has a lot of features, over clocking tools, but
NO SERIAL PORT.
So, I've bought a cheap no-name PCI-Express
card with 2 RS-232 ports:
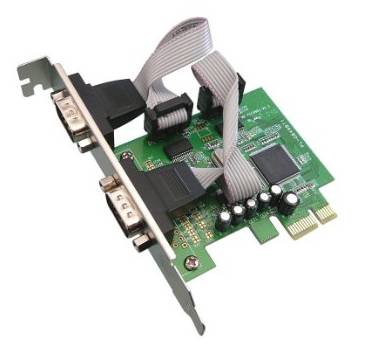
It has MosChip 9922
chipset.
Here
are the things, that I have learned trying (and succeeding) to make things work
- to get the Ubuntu console over serial RS-232
connector being able to see the kernel loading/booting process,
and
even managing remotely the GRUB2 bootloader.
Let's
start.
1. PCI-Express card installation.
The
card have been inserted. PC started. Is the card visible to Ubuntu
12.04?
root@mysiaki4:~#
dmesg |grep ttyS
[ 0.000000] Command line:
BOOT_IMAGE=/boot/vmlinuz-3.5.0-45-generic
root=UUID=2cb2b9c0-fb80-4f39-9055-29f88c2288e4 ro
console=tty0 console=ttyS4,115200n8
[ 0.000000] Kernel command line:
BOOT_IMAGE=/boot/vmlinuz-3.5.0-45-generic root=UUID=2cb2b9c0-fb80-4f39-9055-29f88c2288e4
ro console=tty0 console=ttyS4,115200n8
[ 0.566237] 0000:04:00.0: ttyS4 at I/O 0xb880
(irq = 16) is a ST16650V2
[ 2.597316] console [ttyS4] enabled
[ 2.622031] 0000:04:00.1: ttyS5 at I/O 0xbc00
(irq = 17) is a ST16650V2
Yes!
The ports were found as:
ttyS4 - I/O address 0xb880 IRQ16
ttyS5 - I/O address 0xbc00 IRQ17
This
has been confirmed also by the 'setserial -g'
(install the setserial if needed: apt-get install setserial):
root@mysiaki4:~#
setserial -g /dev/ttyS*
/dev/ttyS0,
UART: unknown, Port: 0x03f8, IRQ: 4
/dev/ttyS1,
UART: unknown, Port: 0x02f8, IRQ: 3
/dev/ttyS2,
UART: unknown, Port: 0x03e8, IRQ: 4
/dev/ttyS3,
UART: unknown, Port: 0x02e8, IRQ: 3
/dev/ttyS4, UART: 16650V2,
Port: 0xb880, IRQ: 16
/dev/ttyS5, UART: 16650V2,
Port: 0xbc00, IRQ: 17
And
checking the PCI cards instaled for the device id
reported by dmesg (04 :00) :
root@mysiaki4:~#
lspci |grep 04:00
04:00.0
Serial controller: MosChip Semiconductor Technology
Ltd. PCIe 9922 Multi-I/O Controller
04:00.1
Serial controller: MosChip Semiconductor Technology
Ltd. PCIe 9922 Multi-I/O Controller
root@mysiaki4:~#
As
I wrote earlier there are no serial ports included on the motherboard (I have
checked that couple times - no pin-headers, no connectors marked with COMx), but Ubuntu still reports
the ttyS0 - ttyS3 (the standard COM1-COM4 RS-232 ports with well defined I/O
addresses and interrupts) as present.
This
is because in the PnP architecture these first 4 ports are usually
assigned/defined by the BIOS at startup. So the Linux's
kernel starts numbering the serial ports at PCI/PCI-Express cards counting from
ttyS4 up.
2. Configure the Lantronix
MSS100 - IP address, serial port speed,
etc.
I'm
not going to describe detailed steps there, as each terminal server will have
different configuration steps.
3. Configure the port ttyS4 to work
as serial console in Ubuntu 12.04.
I've
created /etc/init/ttyS4.conf file:
# ttyS4 - getty
#
# This
service maintains a getty on ttyS4 from the point the
system is
# started
until it is shut down again.
start on
stopped rc or RUNLEFVEL=[12345]
stop on runlevel [!12345]
respawn
exec /sbin/getty -L 115200 ttyS4 vt102
Tell
Ubuntu to start the terminal:
start ttyS4
Success
- login prompt has appeared at the serial console.
4. Configure the kernel boot
parameters, so the kernel startup messages will be printed to the ttyS4 console
Edit
the /etc/default/grub. Add the following to the GRUB_CMDLINE_LINUX:
console=tty0
console=ttyS4,115200n8
tty0
says, that the booting messages will still be printed to the local terminal
(monitor connected to the server)
ttyS4
says, that at the same time messages should go to the serial console
At
this stage mine /etc/default/grub looked like this:
# If you
change this file, run 'update-grub' afterwards to update
#
/boot/grub/grub.cfg.
# For full
documentation of the options in this file, see:
# info -f grub -n 'Simple configuration'
GRUB_DEFAULT=0
GRUB_TIMEOUT=15
GRUB_DISTRIBUTOR=`lsb_release -i -s 2> /dev/null
|| echo Debian`
GRUB_CMDLINE_LINUX="console=tty0
console=ttyS4,115200n8"
Remember
to regenerate /boot/grub/grub.cfg with the new config
in /etc/default/grub by executing:
update-grub
Reboot
the server and watch the new serial console:
sync;sync;reboot
5. Attempt to configure GRUB 1.99 to
use serial port console.
Seeing
the kernel boot process is great, but it would be even better to get GRUB menu
/ commands working over the serial console.
I've
found, that to make GRUB2 (v1.99) working with serial console the following
parameters need to be added to the /etc/default/grub:
GRUB_TERMINAL="console
serial"
GRUB_SERIAL_COMMAND="serial
--unit=0 --speed=115200 --word=8 --parity=no --stop=1"
GRUB_TERMINAL_INPUT="console
serial"
GRUB_TERMINAL_OUTPUT="console
serial"
unit
- this is the serial port number
console
- this is the monitor connected to the server
serial
- this is the serial port we are going to use for remote GRUB access
The
problem is, that the "unit" parameter accepts only values 0 - 3 - for
the standard COM1-COM4 ports, with standard I/O addresses.
In
theory support for non-standard ports is possible by using '--port" option
instead of the "--unit" ad putting the I/O address of the card there.
I
have tried this. I have entered to my /etc/default/grub the following:
GRUB_TERMINAL="console
serial"
GRUB_SERIAL_COMMAND="serial
--port=0xb880 --speed=115200 --word=8 --parity=no --stop=1"
GRUB_TERMINAL_INPUT="console
serial"
GRUB_TERMINAL_OUTPUT="console
serial"
Then
update-grub, and sync;sync;reboot.
The
result: server just hunged for good. The GRUB didn’t
even show up on the local monitor.
I
had to start the system from LiveCD and restore
previous /boot/grub/grub.cfg file.
Some
people mentioned, that nowadays PCI/PCI-Express cards have often different
crystal frequency than the standard RS-232 ports used to be mounted on
motherboards sometime ago.
This
requires some special changes to the GRUB code to manage different divider
values to get proper speeds.
One
Guy even managed this for the PCI serial card that he owned and prepared base-clock
frequency patch for GRUB . See the email thread and patch listing here:
http://lists.gnu.org/archive/html/grub-devel/2008-11/msg00017.html
Unfortunately
it was not mentioned, for which version of GRUB release the patch is, and I
couldn’t determine it by myself. Post was quite old (year 2008), so I thought,
that maybe the problem has been already solved in newer version of GRUB.
6. Downloading the most recent GRUB
version.
I
decided to get the most recent GRUB2 developer version and try to apply the
patch there.
The
most recent version can be obtained via git. At the
time I was doing this it was GRUB 2.02~beta2. Here is how I have done this:
apt-get
install git
mkdir /install/grub
cd /install/grub
git clone
git://git.savannah.gnu.org/grub.git
and
when download finished:
cd grub
First
I wanted just to compile the GRUB without any modifications, to see if it
works.
I
have read the INSTALL doc.
I
have installed all required packages mentioned there: bison, gettext, binutils, flex, libdevmapper, sdl, libpciaccess, libusb, python, autoconf, automake, qemu, xorriso.
The
exact package names were not mentioned in the GRUB INSTALL doc, so each time I have
searched for appropriate name like this:
root@mysiaki4:/install/grub2/grub#
apt-cache pkgnames |grep libdevmapper
libdevmapper1.02.1
libdevmapper-event1.02.1
libdevmapper-dev
and
then installed the executable and headers like this:
apt-get
install libdevmapper1.02.1
apt-get
install libdevmapper-dev
When
all packages have been found/installed I have started the compilation.
7. Prepare the “configure” script.
root@mysiaki4:/install/grub2/grub# ./autogen.sh
Importing unicode...
Importing libgcrypt...
Generating Automake input...
Saving
timestamps...
Running autoreconf...
autoreconf: Entering
directory `.'
autoreconf:
configure.ac: not using Gettext
autoreconf: running: aclocal -I m4
autoreconf:
configure.ac: tracing
autoreconf:
configure.ac: AM_GNU_GETTEXT is used, but not AM_GNU_GETTEXT_VERSION
autoreconf:
configure.ac: not using Libtool
autoreconf: running:
/usr/bin/autoconf
autoreconf: running:
/usr/bin/autoheader
autoreconf: running: automake --add-missing --copy --no-force
autoreconf: Leaving
directory `.'
8. Executing the “configure”.
root@mysiaki4:/install/grub2/grub#
./configure
checking
build system type... x86_64-unknown-linux-gnu
checking
host system type... x86_64-unknown-linux-gnu
checking
target system type... x86_64-unknown-linux-gnu
checking
for a BSD-compatible install... /usr/bin/install -c
checking
whether build environment is sane... yes
checking
for a thread-safe mkdir -p... /bin/mkdir -p
checking
for gawk... no
checking
for mawk... mawk
checking
whether make sets $(MAKE)... yes
checking
for cmp... cmp
checking
for bison... bison
checking
for ranlib... ranlib
checking
for gawk... (cached) mawk
checking
for style of include used by make... GNU
checking
for gcc... gcc
checking
whether the C compiler works... yes
checking
for C compiler default output file name... a.out
checking
for suffix of executables...
checking
whether we are cross compiling... no
checking
for suffix of object files... o
checking
whether we are using the GNU C compiler... yes
checking
whether gcc accepts -g... yes
checking
for gcc option to accept ISO C89... none needed
checking
dependency style of gcc... gcc3
...
config.status: executing
depfiles commands
config.status: executing
po-directories commands
config.status: creating po/POTFILES
config.status: creating po/Makefile
*******************************************************
GRUB2 will
be compiled with following components:
Platform:
i386-pc
With devmapper support: Yes
With memory
debugging: No
With disk
cache statistics: No
With boot
time statistics: No
efiemu runtime: Yes
grub-mkfont: Yes
grub-mount:
No (need FUSE library)
starfield theme: Yes
With DejaVuSans font from /usr/share/fonts/truetype/ttf-dejavu/DejaVuSans.ttf
With libzfs support: No (need zfs
library)
Build-time
grub-mkfont: Yes
Without unifont
Without liblzma (no support for XZ-compressed mips
images) (need lzma library)
*******************************************************
9. Time for compilation.
root@mysiaki4:/install/grub2/grub#
make
make all-recursive
make[1]:
Entering directory `/install/grub2/grub'
Making all
in grub-core/gnulib
make[2]:
Entering directory `/install/grub2/grub/grub-core/gnulib'
make all-recursive
make[3]:
Entering directory `/install/grub2/grub/grub-core/gnulib'
make[4]:
Entering directory `/install/grub2/grub/grub-core/gnulib'
...
make[2]:
Entering directory `/install/grub2/grub/po'
make[2]:
Leaving directory `/install/grub2/grub/po'
Making all
in docs
make[2]:
Entering directory `/install/grub2/grub/docs'
restore=:
&& backupdir=".am$$" && \
am__cwd=`pwd` && CDPATH="${ZSH_VERSION+.}:"
&& cd . && \
rm -rf $backupdir && mkdir $backupdir && \
if (/bin/true --version) >/dev/null
2>&1; then \
for f in grub.info grub.info-[0-9]
grub.info-[0-9][0-9] grub.i[0-9] grub.i[0-9][0-9];
do \
if test -f $f; then mv $f $backupdir; restore=mv; else :; fi; \
done; \
else :; fi
&& \
cd "$am__cwd"; \
if /bin/true -I . \
-o grub.info grub.texi;
\
then \
rc=0; \
CDPATH="${ZSH_VERSION+.}:"
&& cd .; \
else \
rc=$?; \
CDPATH="${ZSH_VERSION+.}:"
&& cd . && \
$restore $backupdir/*
`echo "./grub.info" | sed 's|[^/]*$||'`; \
fi; \
rm -rf $backupdir; exit $rc
restore=:
&& backupdir=".am$$" && \
am__cwd=`pwd` && CDPATH="${ZSH_VERSION+.}:"
&& cd . && \
rm -rf $backupdir && mkdir $backupdir && \
if (/bin/true --version) >/dev/null
2>&1; then \
for f in grub-dev.info
grub-dev.info-[0-9] grub-dev.info-[0-9][0-9] grub-dev.i[0-9]
grub-dev.i[0-9][0-9]; do \
if test -f $f; then mv $f $backupdir; restore=mv; else :; fi; \
done; \
else :; fi
&& \
cd "$am__cwd"; \
if /bin/true -I . \
-o grub-dev.info grub-dev.texi; \
then \
rc=0; \
CDPATH="${ZSH_VERSION+.}:"
&& cd .; \
else \
rc=$?; \
CDPATH="${ZSH_VERSION+.}:"
&& cd . && \
$restore $backupdir/*
`echo "./grub-dev.info" | sed
's|[^/]*$||'`; \
fi; \
rm -rf $backupdir; exit $rc
make[2]:
Leaving directory `/install/grub2/grub/docs'
Making all
in util/bash-completion.d
make[2]:
Entering directory `/install/grub2/grub/util/bash-completion.d'
../../config.status --file=grub:grub-completion.bash.in
config.status: creating
grub
make[2]:
Leaving directory `/install/grub2/grub/util/bash-completion.d'
make[1]:
Leaving directory `/install/grub2/grub'
10. Installation of binary files
root@mysiaki4:/install/grub2/grub#make install
This
step copies grub binary files (like grub-install, grub-mkconfig)
to /usr/local/sbin and
manual files to man directory.
It
does not install new GRUB on the HDD.
11. Install the new compiled GRUB to
hard drive boot sector
Still
being in the /install/grub/grub directory execute the ./grub-install pointing the HDD you want the GRUB to be
installed to:
root@mysiaki4:/install/grub/grub#
./grub-install /dev/sda
Installing
for i386-pc platform.
Installation
finished. No error reported.
12. Update the /boot/grub/grub.cfg
based on our settings in the /etc/default/grub so it will match the new GRUB
binary.
root@mysiaki4:/install/grub/grub# update-grub
Generating
grub configuration file ...
Found linux image: /boot/vmlinuz-3.8.0-29-generic
Found initrd image: /boot/initrd.img-3.8.0-29-generic
Done
13. Restart the server to check if
new GRUB is working
root@mysiaki4:/install/grub/grub#
sync;sync;reboot
The
result:
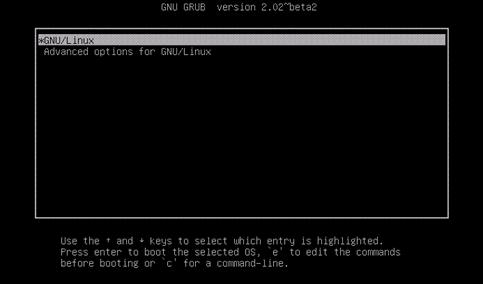
Ok,
so the good thing is, that the GRUB version is 2.02~beta2.
But
what happened to the menu? Where is my nice classic looking menu with listed
kernel versions, recovery mode and memtest?
14. Check if the PCI-Express card with
serial ports is visible to GRUB and could work as GRUB console.
So,
when the new GRUB 2.02~beta2 appeared on the VGA screen connected to my server
I have pressed the “c” key to get the command-line mode.
GNU GRUB version 2.02~beta2
Minimal BASH-like line editing is supported. For the first word,
TAB
lists possible command completions. Anywhere else TAB lists
possible
device or file completions. ESC at any time exits.
First check – is my
PCI-Express card visible to GRUB? I have used the lspci
command and searched for the same device id that was mentioned in the dmesg and lspci output, when I
was searching for ttyS ports under Ubuntu (point 1 of this doc):
grub> lspci
00:00.0 8086:3405 [0600] Host Bridge
00:01.0 8086:3408 [0604] PCI-PCI Bridge
00:02.0 8086:3409 [0604] PCI-PCI Bridge
...
04:00.0 9710:9922 [0700] Communication
controller [PI 02]
04:00.1 9710:9922 [0700] Communication controller [PI 02]
...
ff:06.1
8086:2db1 [0600] Host Bridge
ff:06.2 8086:2db2 [0600] Host Bridge
ff:06.3 8086:2db3 [0600] Host Bridge
grub>
Ok,
so the card and 2 serial ports are visible, but what is the I/O port address to
use in the serial command?
I’ve
found, that lcpci
–i gives much more details:
grub> lspci -i
00:00.0 8086:3405 [0600] Host Bridge
00:01.0 8086:3408 [0604] PCI-PCI Bridge
32-bit memory space 2 at
0x0000000000090900 [non-prefetchable]
32-bit memory space 3 at
0x000000002000e0d0 [non-prefetchable]
32-bit memory space 4 at
0x00000000fbe0fbe0 [non-prefetchable]
IO space 5 at 0x1fff0
00:02.0 8086:3409 [0604] PCI-PCI Bridge
32-bit memory space 2 at
0x0000000000080800 [non-prefetchable]
32-bit memory space 3 at
0x00000000200000f0 [non-prefetchable]
32-bit memory space 4 at
0x00000000fbd0fbd0 [non-prefetchable]
IO space 5 at 0x1fff0
...
04:00.0
9710:9922 [0700] Communication controller [PI 02]
IO
space 0 at 0xb880
32-bit memory space 1 at
0x00000000fbcfd000 [non-prefetchable]
32-bit memory space 5 at
0x00000000fbcfc000 [non-prefetchable]
04:00.1 9710:9922 [0700] Communication controller [PI 02]
IO
space 0 at 0xbc00
32-bit memory space 1 at
0x00000000fbcff000 [non-prefetchable]
32-bit memory space 5 at 0x00000000fbcfe000
[non-prefetchable]
grub>
Ok,
so the I/O port addresses are the same as reported by dmesg and setsetial commands.
Let’s
check what the syntax of the serial command is:
grub>
help serial
Usage: serial [OPTIONS...]
Configure serial port.
-u, --unit
Set the serial unit.
-p,
--port
Set the serial port address.
-s,
--speed
Set the serial port speed.
-w,
--word
Set the serial port word length.
-r, --parity
Set the serial port parity.
-t,
--stop
Set the serial port stop bits.
-b, --base-clock Set the base
frequency.
-f, --rtscts=on|off
Enable/disable RTS/CTS.
-h,
--help
Display this help and exit.
--usage
Display the usage of this command and exit.
grub>
Wow,
so the “base-clock” patch, that I have mentioned at point 4 of this doc seemed
to be included in the release 2.02~beta2.
Let’s
try to configure first serial port at PCI-Express card:
grub>
serial --port=0xb880 --speed=115200
grub>
Looks
promising - no errors reported.
To
redirect the output of GRUB to serial port we need to use the terminal_output command.
Similarly
to be able input keys via remote serial connection, the termina_input command has to be used.
I’ve
found, that terminal_output and terminal_input
commands without any
parameters give some valuable info:
grub> terminal_output
Active output terminals:
console
Available output terminals:
gfxterm serial_portb880
vga_text spkmodem mda_text cbmemc audio
grub>
grub> terminal_input
Active input terminals:
console
Available input terminals:
serial_portb880 at_keyboard
grub>
This
is a great hint – so the active input/output is console, but I
it mentioned, that something called serial_portb880
is also available.
So
it looks, that the command serial
--port=0xb880 has
created new input / output channel: serial_portb880.
Ok,
then let’s try to use it then:
grub> terminal_output console serial_portb880
Guess what. I got the
prompt:
grub>
on
my serial console output!!!
And
after:
grub> terminal_input console serial_portb880
I could also use my
remote keyboard J
Nice
job. So the only remaining thing is to put the above serial card and input /
output commands to the /etc/default/grub,
rebuild the /boot/grub/grub.cfg with
update-grub and
everything should work perfect.
15. Get back the classic GRUB menu
and add all the serial console parameters
I
have found, that since the version 1.98 the GRUB uses different menu structure
(with submenus), but for some reason I had simple menu (without the Advanced
options shown above) when GRUB 1.99 was installed – just before installing the
2.02~beta2 version.
Some
people wrote, that to restore the old - simple menu structure it is needed to
add the following option to the /etc/default/grub:
GRUB_ENABLE_SUBMENU=false
Unfortunately
this haven’t work in my case.
Moreover
I have noticed, that for some reason the /etc/default/grub file is no longer checked by
update-grub at all!
None
of the parameters, that I have entered there had any result in the GRUB
displayed on the monitor after reboot. Even when I’ve set GRUB_TIMEOUT=30 the GRUB displayed after reboot had default 5
seconds timeout.
This
looks as a bug of the 2.02~beta2 version to me.
I
had no more time to find the solution for this issue, so instead of reporting
the problem to the GNU GRUB2 developers I have decided to write my own /boot/grub/grub.cfg file and to disable the update-grub and grub-mkconfig files, so my manually created grub.cfg will not get overwritten by some automatic patch installation or so.
So
here is my final /boot/grub/grub.cfg
file with one kernel
version:
root@mysiaki4:/etc/default#
cat /boot/grub/grub.cfg
#
# DO NOT
EDIT THIS FILE
#
# It is
automatically generated by grub-mkconfig using
templates
# from
/etc/grub.d and settings from /etc/default/grub
#
### BEGIN
/etc/grub.d/00_header ###
if [ -s
$prefix/grubenv ]; then
set have_grubenv=true
load_env
fi
set
default="0"
if [
"${prev_saved_entry}" ]; then
set saved_entry="${prev_saved_entry}"
save_env saved_entry
set prev_saved_entry=
save_env prev_saved_entry
set boot_once=true
fi
function savedefault {
if [ -z "${boot_once}"
]; then
saved_entry="${chosen}"
save_env saved_entry
fi
}
function recordfail {
set recordfail=1
if [ -n "${have_grubenv}"
]; then if [ -z "${boot_once}" ]; then save_env recordfail; fi; fi
}
function load_video {
insmod vbe
insmod vga
insmod video_bochs
insmod video_cirrus
}
serial
--port=0xb880 --speed=115200
terminal_input console
serial
terminal_output console
serial
if [
"${recordfail}" = 1 ] ; then
set timeout=-1
else
set timeout=15
fi
play 480
440 1
### END
/etc/grub.d/00_header ###
### BEGIN
/etc/grub.d/05_debian_theme ###
set menu_color_normal=white/black
set menu_color_highlight=black/light-gray
if background_color 44,0,30; then
clear
fi
### END
/etc/grub.d/05_debian_theme ###
### BEGIN
/etc/grub.d/10_linux ###
function gfxmode {
set gfxpayload="${1}"
if [ "${1}" = "keep" ];
then
set vt_handoff=vt.handoff=7
else
set vt_handoff=
fi
}
if [
"${recordfail}" != 1 ]; then
if [ -e ${prefix}/gfxblacklist.txt ]; then
if hwmatch
${prefix}/gfxblacklist.txt 3; then
if [ ${match} = 0 ]; then
set linux_gfx_mode=keep
else
set linux_gfx_mode=text
fi
else
set linux_gfx_mode=text
fi
else
set linux_gfx_mode=keep
fi
else
set linux_gfx_mode=text
fi
export linux_gfx_mode
if [
"${linux_gfx_mode}" != "text" ];
then load_video; fi
menuentry 'Ubuntu, with Linux 3.5.0-45-generic' --class ubuntu --class gnu-linux --class gnu --class os {
### recordfail
gfxmode $linux_gfx_mode
insmod gzio
insmod part_msdos msdos
insmod diskfilter mdraid1x
insmod ext2
set root='mduuid/f0d7cff3dbc9fc91fa853205ef834a0d'
search --no-floppy --fs-uuid --set=root --hint='mduuid/f0d7cff3dbc9fc91fa853205ef834a0d'
2cb2b9c0-fb80-4f39-9055-29f88c2288e4
echo
'Loading Linux 3.5.0-45-generic ...'
linux /boot/vmlinuz-3.5.0-45-generic
root=UUID=2cb2b9c0-fb80-4f39-9055-29f88c2288e4 ro
console=tty0 console=ttyS4,115200n8
echo
'Loading initial ramdisk ...'
initrd /boot/initrd.img-3.5.0-45-generic
}
menuentry 'Ubuntu, with Linux 3.5.0-45-generic (recovery mode)'
--class ubuntu --class gnu-linux
--class gnu --class os {
### recordfail
insmod gzio
insmod part_msdos msdos
insmod diskfilter mdraid1x
insmod ext2
set root='mduuid/f0d7cff3dbc9fc91fa853205ef834a0d'
search --no-floppy --fs-uuid --set=root --hint='mduuid/f0d7cff3dbc9fc91fa853205ef834a0d'
2cb2b9c0-fb80-4f39-9055-29f88c2288e4
echo
'Loading Linux 3.5.0-45-generic (recovery mode) ...'
linux /boot/vmlinuz-3.5.0-45-generic
root=UUID=2cb2b9c0-fb80-4f39-9055-29f88c2288e4 ro
recovery nomodeset console=tty0
console=ttyS4,115200n8
echo
'Loading initial ramdisk ...'
initrd /boot/initrd.img-3.5.0-45-generic
}
### END
/etc/grub.d/10_linux ###
### BEGIN
/etc/grub.d/20_linux_xen ###
### END
/etc/grub.d/20_linux_xen ###
### BEGIN
/etc/grub.d/20_memtest86+ ###
menuentry
"Memory test (memtest86+) - only VGA monitor" {
insmod part_msdos msdos
insmod diskfilter mdraid1x
insmod ext2
set root='mduuid/f0d7cff3dbc9fc91fa853205ef834a0d'
search --no-floppy --fs-uuid --set=root --hint='mduuid/f0d7cff3dbc9fc91fa853205ef834a0d'
2cb2b9c0-fb80-4f39-9055-29f88c2288e4
linux16 /boot/memtest86+.bin
}
### BEGIN
/etc/grub.d/30_os-prober ###
### END
/etc/grub.d/30_os-prober ###
### BEGIN
/etc/grub.d/30_uefi-firmware ###
### END
/etc/grub.d/30_uefi-firmware ###
### BEGIN
/etc/grub.d/40_custom ###
# This file
provides an easy way to add custom menu entries. Simply type the
# menu
entries you want to add after this comment.
Be careful not to change
# the 'exec
tail' line above.
### END /etc/grub.d/40_custom ###
### BEGIN
/etc/grub.d/41_custom ###
if [
-f $prefix/custom.cfg ]; then
source $prefix/custom.cfg;
fi
### END
/etc/grub.d/41_custom ###
root@mysiaki4:/etc/default#
16. The End
Here
is movie showing the final result:
https://www.youtube.com/watch?v=p6mg4p3OSVc
If
you have any comments or know how to make GRUB 2.02~beta2 use the
/etc/default/grub configuration – please send me email to pklawit(at)gmail(dot)com.
Best
Regards,
Piotr